
| 일 | 월 | 화 | 수 | 목 | 금 | 토 |
|---|---|---|---|---|---|---|
| 1 | ||||||
| 2 | 3 | 4 | 5 | 6 | 7 | 8 |
| 9 | 10 | 11 | 12 | 13 | 14 | 15 |
| 16 | 17 | 18 | 19 | 20 | 21 | 22 |
| 23 | 24 | 25 | 26 | 27 | 28 | 29 |
| 30 |
- 개발자
- Datastore
- Jetpack Compose
- Navigation Component
- Binding Adapter
- imageview
- Android
- android studio
- 스플래시
- Gradle
- TypeConverter
- Livedata
- fragment
- Safe Args
- BottomNavigationView
- recyclerview
- themes.xml
- 취업
- 테마
- electron
- 일렉트론
- 면접
- asLiveData()
- nav_graph
- 주석
- ViewModel
- 안드로이드
- room
- hilt
- kotlin
- Today
- Total
나만 보는 일기장
[Navigation Component] Navigation Component 사용법 본문
0. 프로젝트 설정
앱 단위 Gradle
plugins {
    ...

    id 'androidx.navigation.safeargs.kotlin'
}

...

dependencies {
    ...

    def nav_version = "2.4.0-alpha06"

    // Kotlin
    implementation "androidx.navigation:navigation-fragment-ktx:$nav_version"
    implementation "androidx.navigation:navigation-ui-ktx:$nav_version"

    // Feature module Support
    implementation "androidx.navigation:navigation-dynamic-features-fragment:$nav_version"

    // Testing Navigation
    androidTestImplementation "androidx.navigation:navigation-testing:$nav_version"
}
프로젝트 단위 Gradle
dependencies {
...
// NOTE: Do not place your application dependencies here; they belong
// in the individual module build.gradle files
...
// Safe Args
def nav_version = "2.4.0-alpha06"
classpath "androidx.navigation:navigation-safe-args-gradle-plugin:$nav_version"
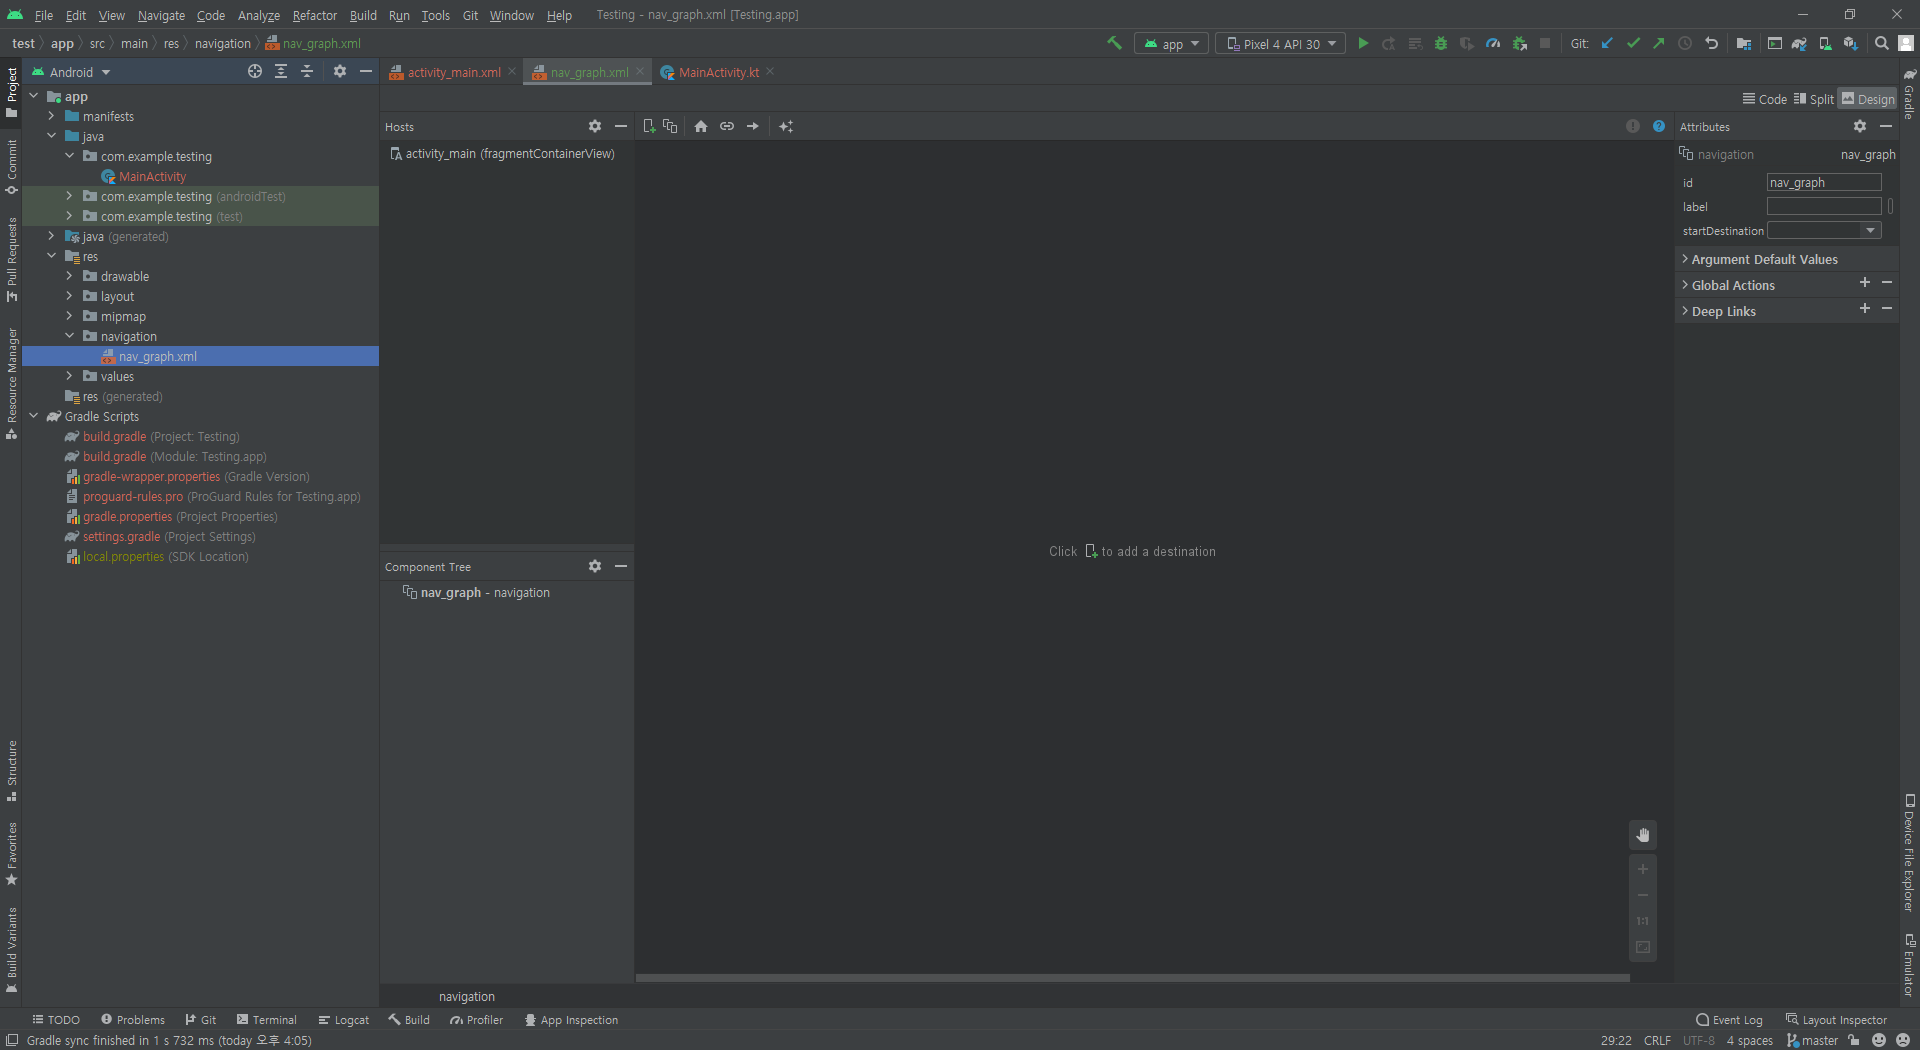
}1. nav_graph.xml 생성
res 폴더 오른쪽 클릭 → New → Android Resource File을 선택해준다.
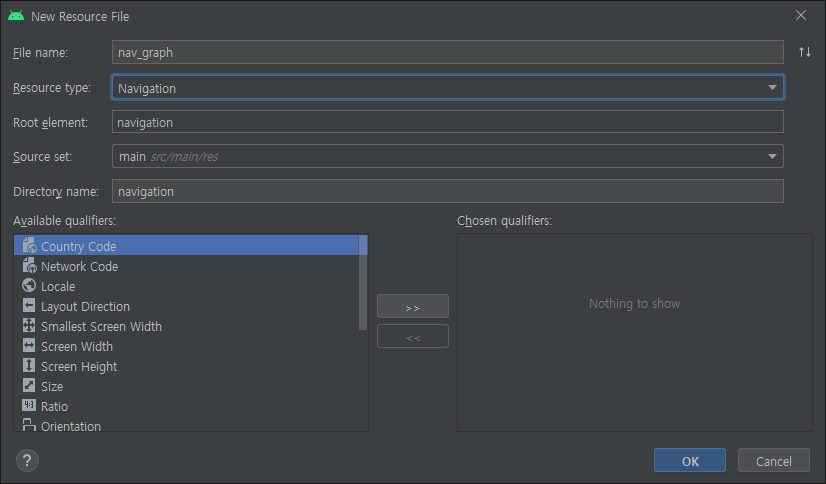
파일 이름은 nav_graph, Resource type은 Navigation으로 해주고 OK를 누른다.

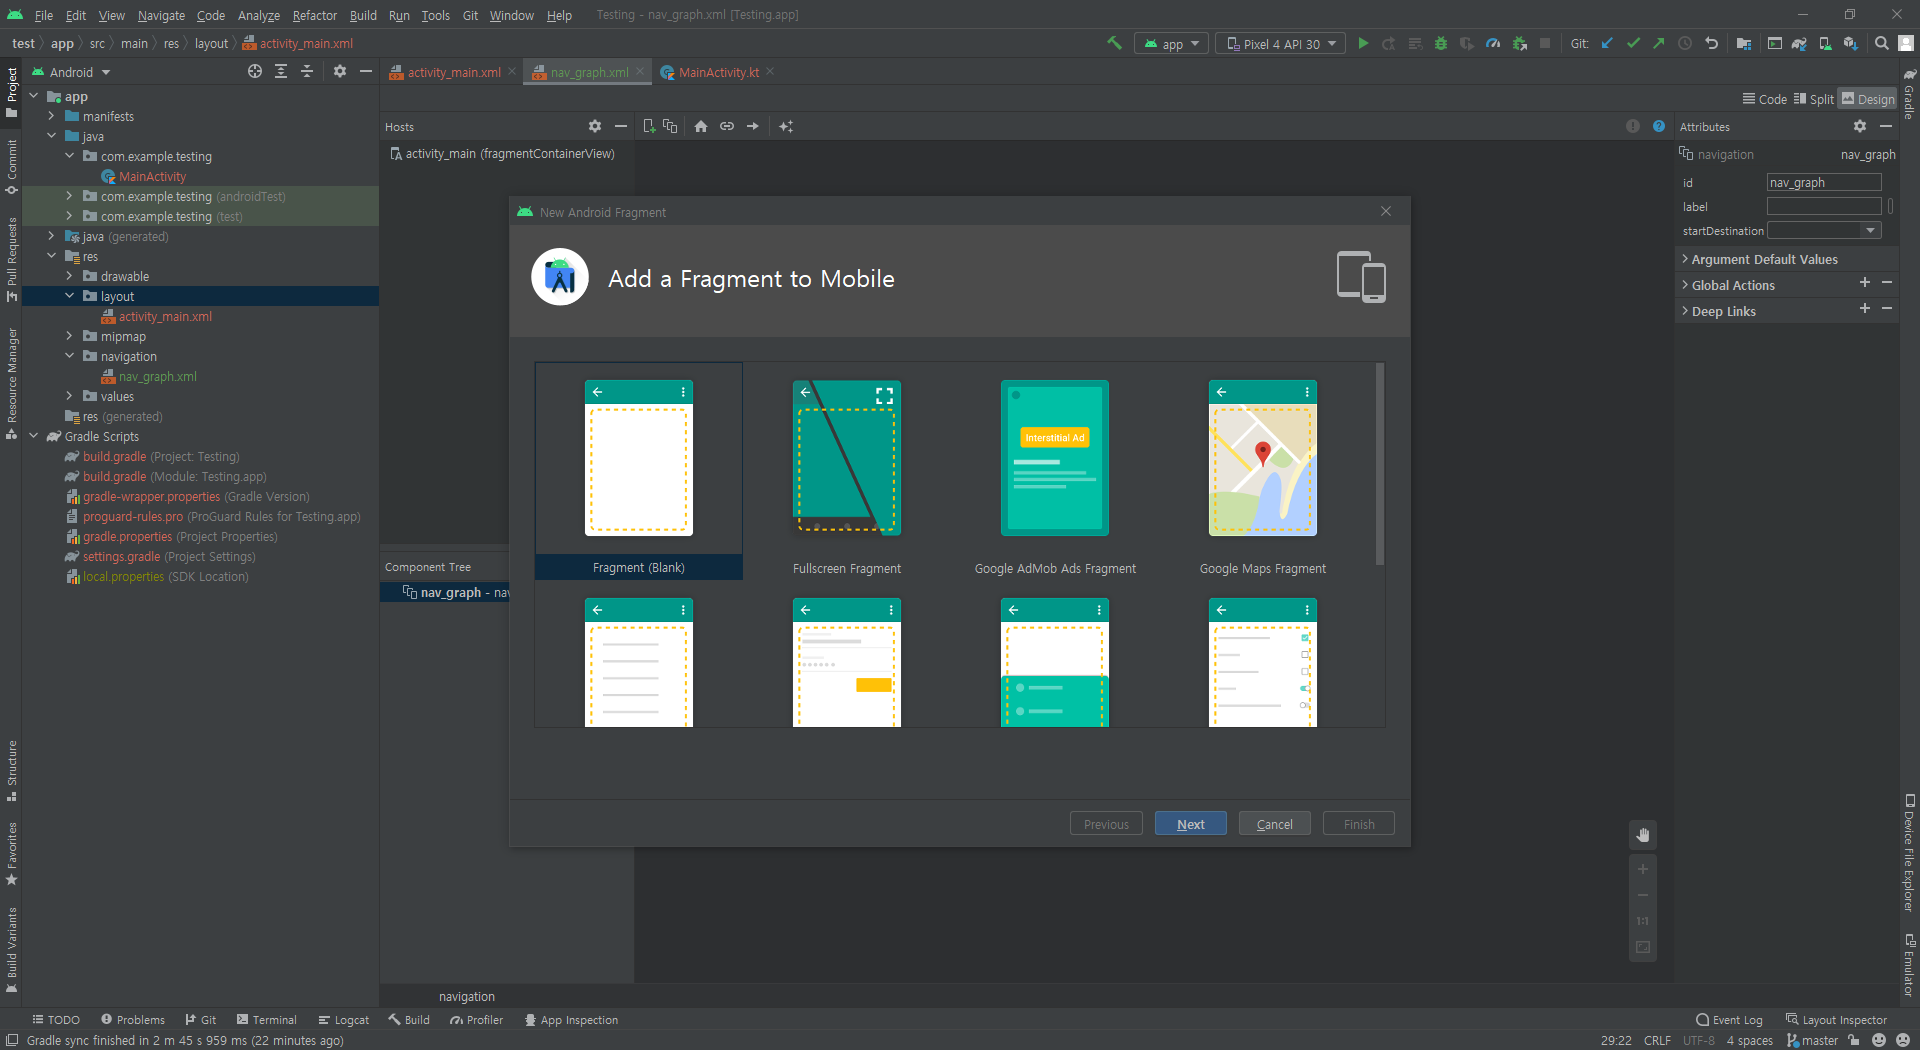
2. NavHostFragment 생성
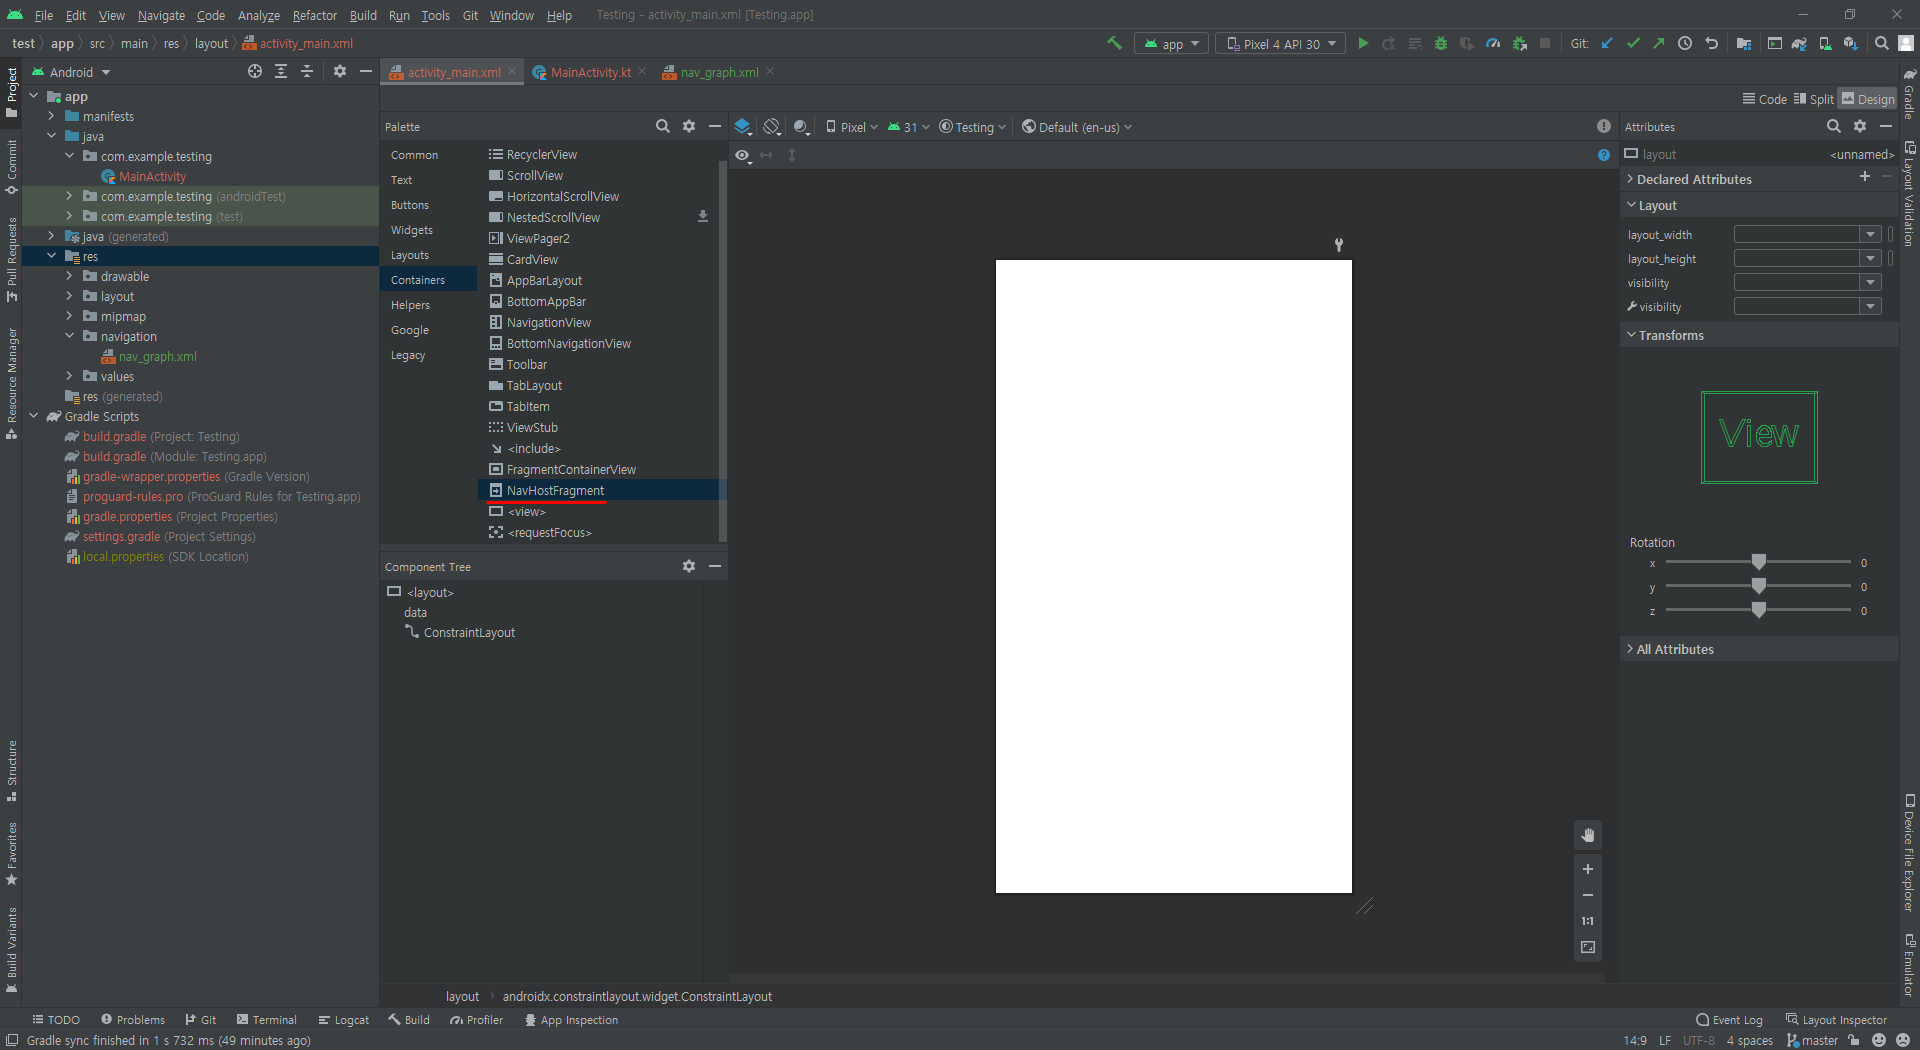
프래그먼트를 표시할 액티비티의 xml 파일에 NavHostFragment를 드래그해서 넣어준다.

아까 만든 nav_graph가 표시되는데 선택하고 OK를 눌러준다.
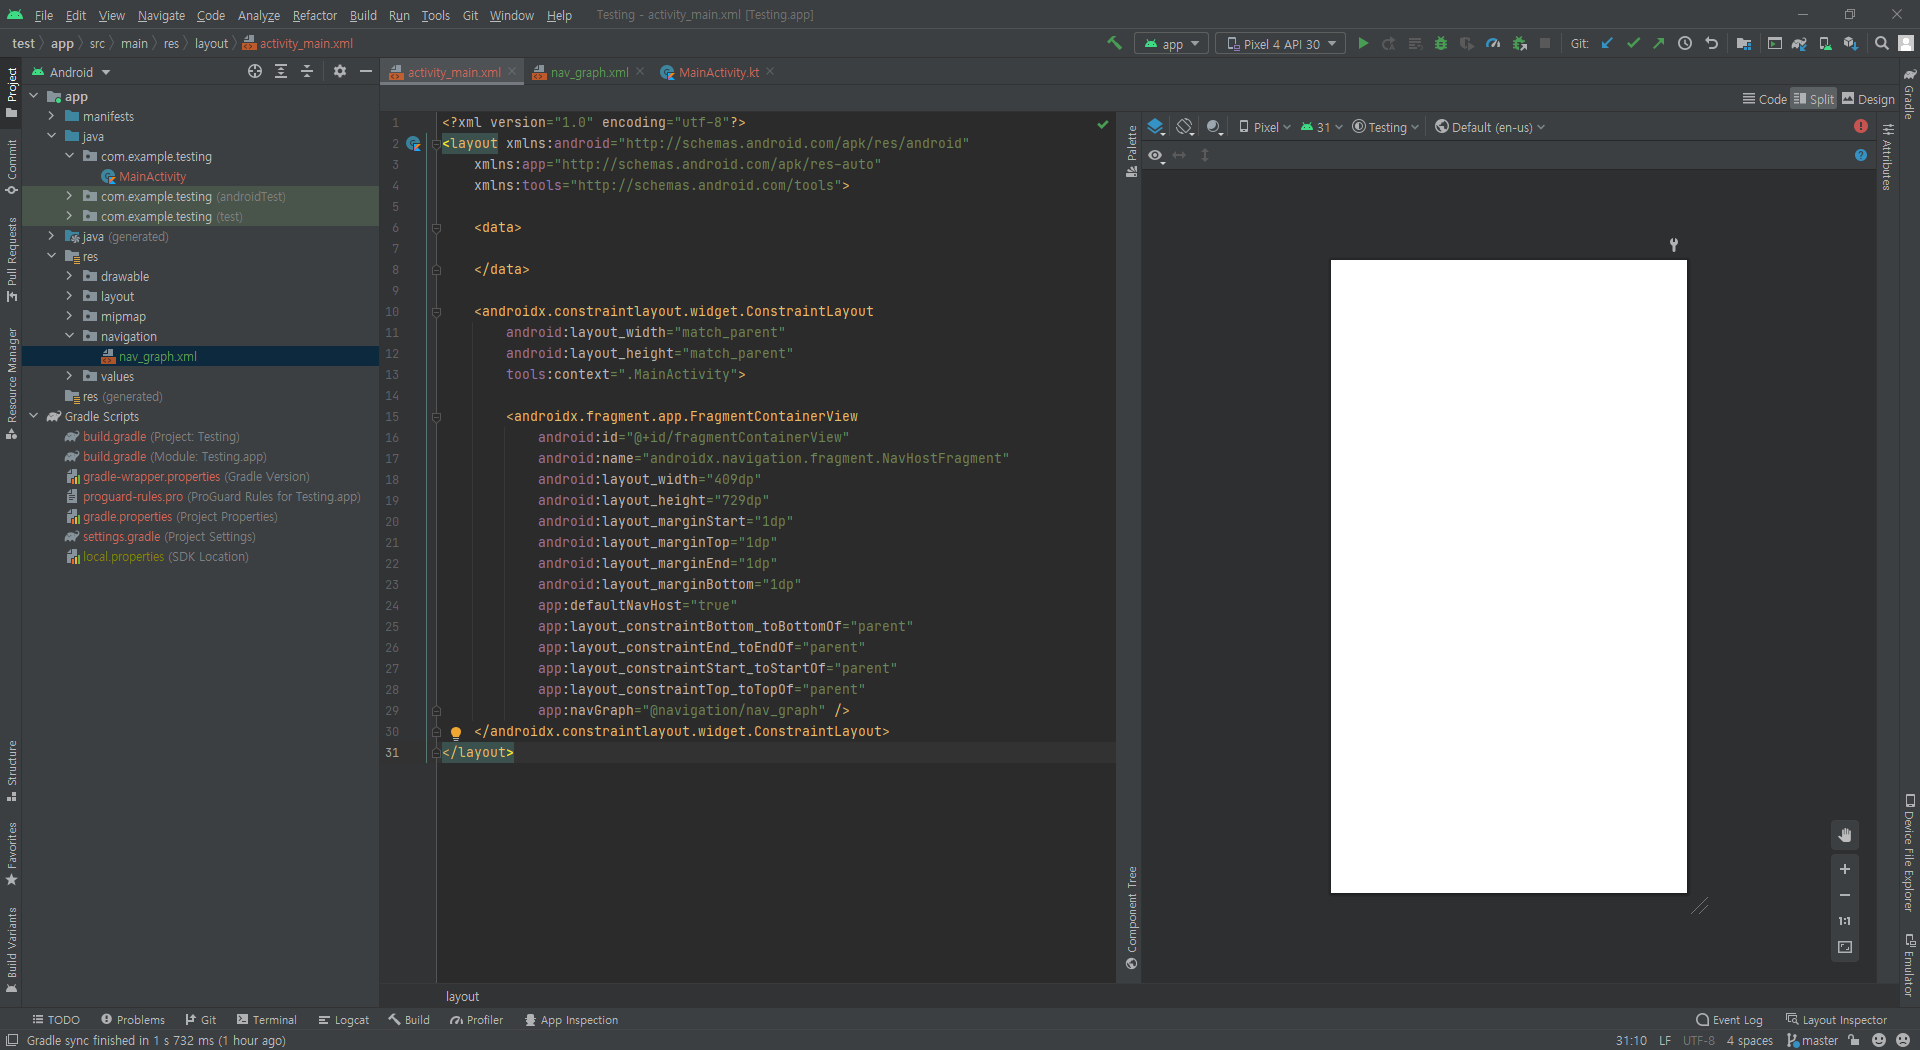
nav_graph.xml에도 가보면 Hosts에 액티비티가 추가된 모습을 볼 수 있다.
3. Navigation Destinations 추가
액티비티에 표시될 각각의 프래그먼트들을 Navigation Destinations라고 한다.
nav_graph.xml에서 destination을 추가해준다.


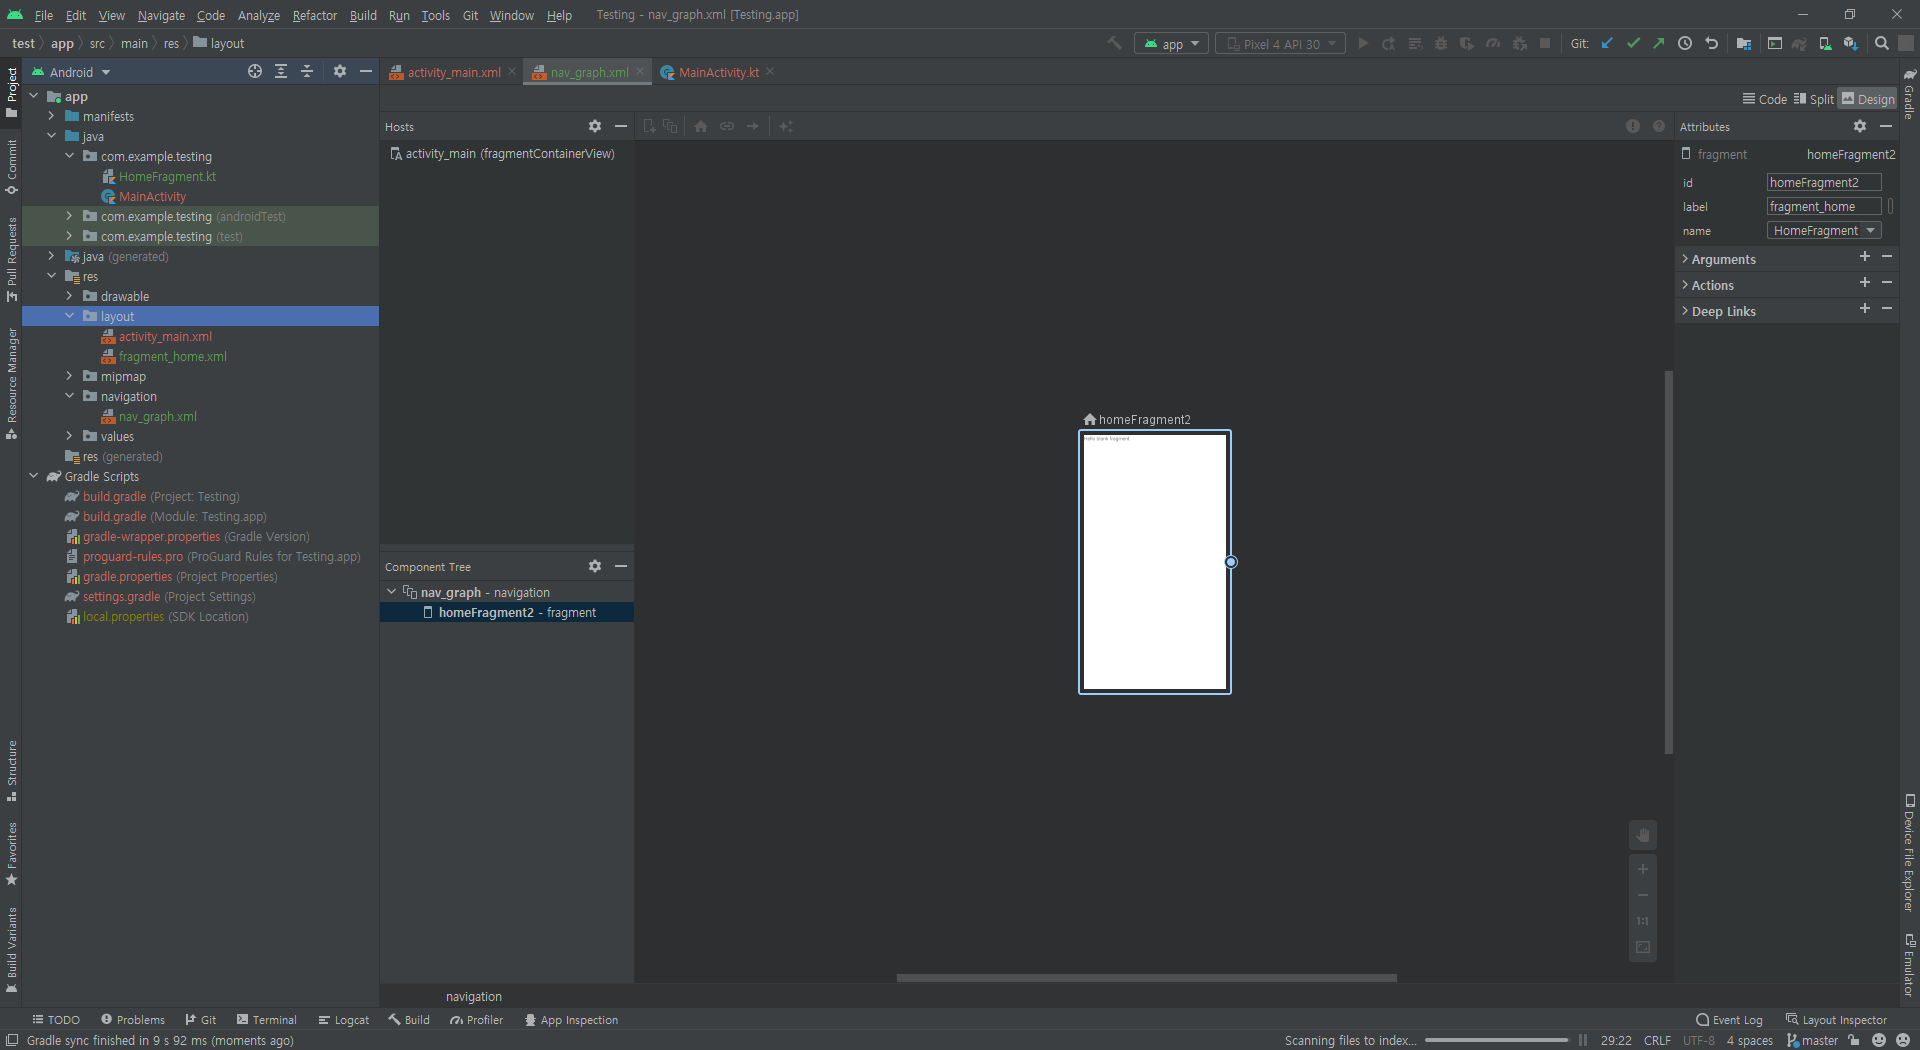
생성을 완료하면 이렇게 nav_graph에 잘 표시되는 것을 알 수 있다.
4. Navigation Action 설정하기

프래그먼트간의 이동을 Navigation Action이라고 부르고, 이를 만들기 위해서는, 출발점이 될 프래그먼트를 클릭하고,
프래그먼트 오른쪽에 나타나는 원을 드래그해서 도착점이 될 프래그먼트에 연결하면 된다.
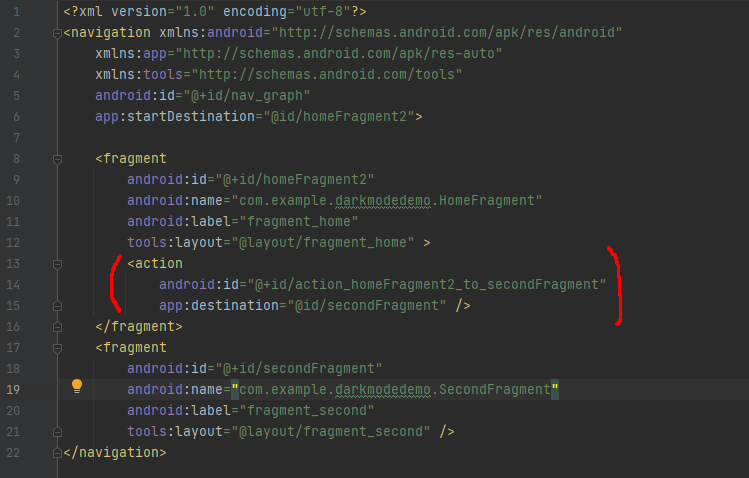
만들어진 액션은 출발점이 되는 프래그먼트의 안에 <action> 태그로 저장된다.
액션을 만들었으니 사용을 해보자.
5. Navigation Action 사용하기
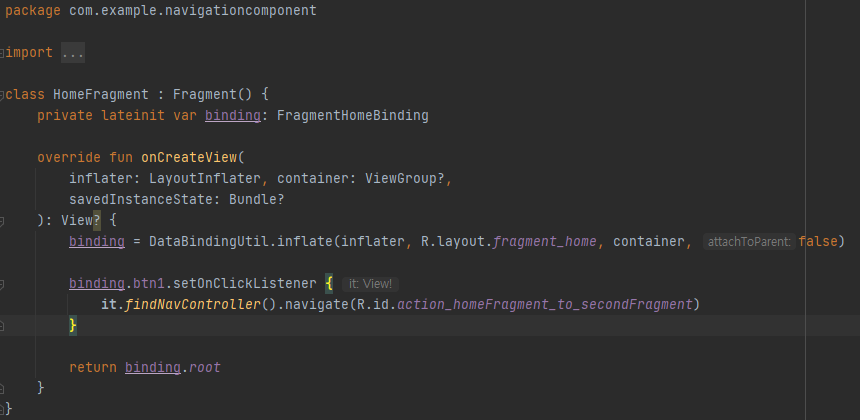
대충 이런식으로 findNavController() 함수를 통해 내비게이션 컨트롤러를 받아오고, navigate() 함수 안에
사용할 액션의 id를 전달해 호출함으로써 액션을 사용할 수 있다.
5-1. Action에 Safe Args 넣어 전달하기
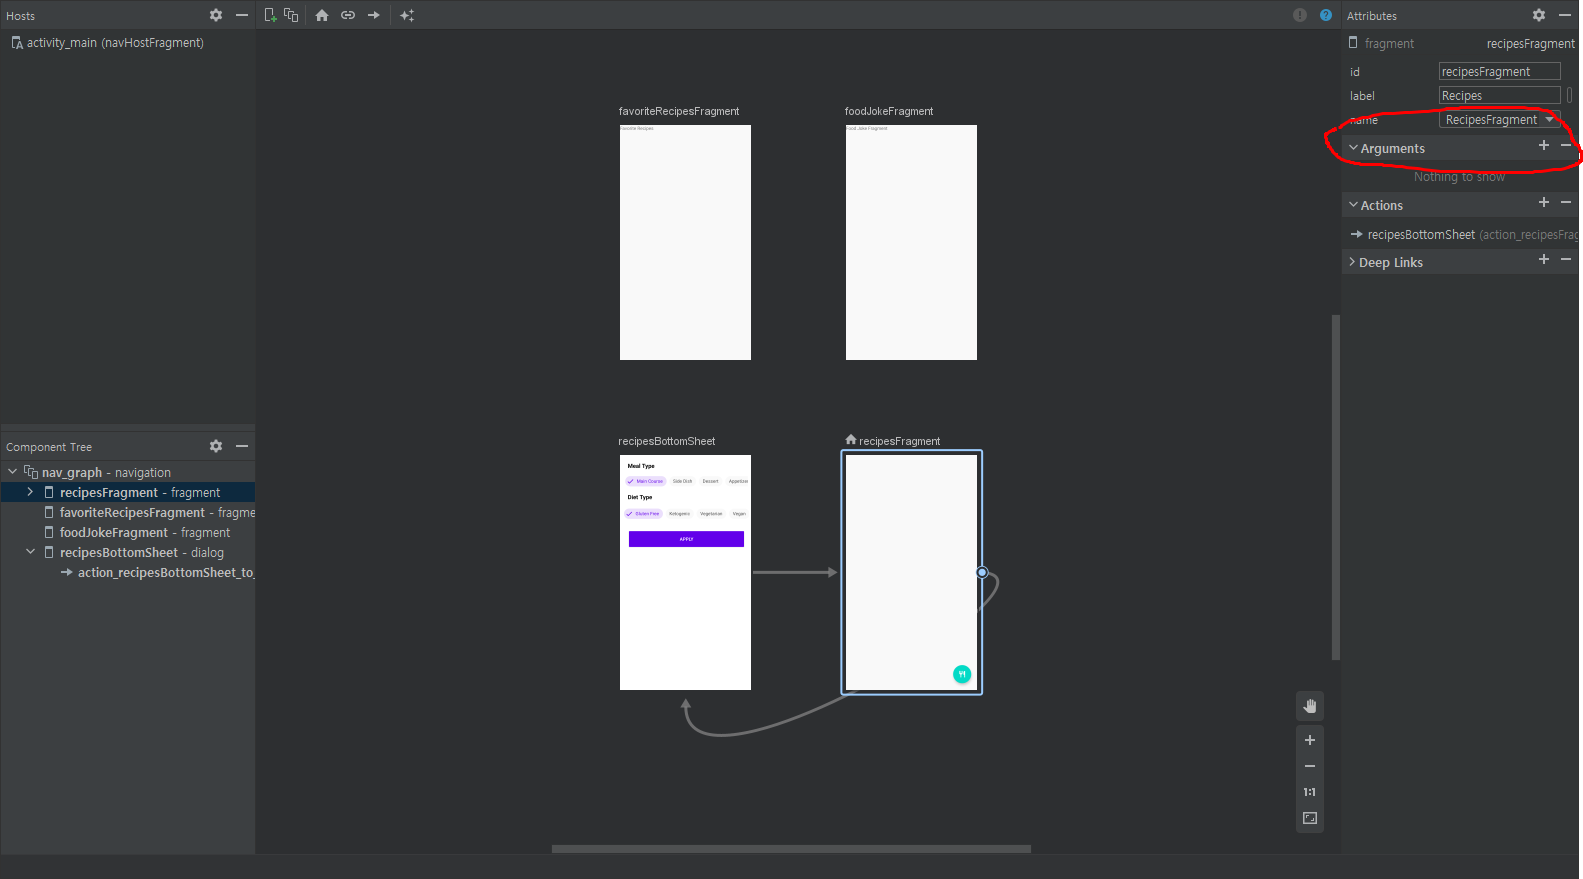
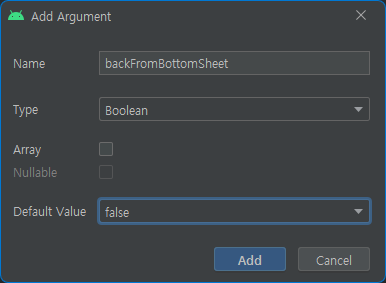
오른쪽 Arguments에서 + 버튼을 눌러 값을 추가할 수 있다.
val action = RecipesBottomSheetDirections.actionRecipesBottomSheetToRecipesFragment(true)
findNavController().navigate(action)
이렇게 변수를 만들어 놓으면 액션을 사용할 때 매개변수로 쓸 수 있게 된다. (위 코드 첫 줄의 마지막 부분처럼)
이렇게 Safe Args를 만들어놓은 뒤, 뷰에서 접근하기 위해서는
private val args by navArgs<RecipesFragmentArgs>()위와 같이 변수를 만들어 접근할 수 있다.
5-2. Action에 애니메이션 사용하기
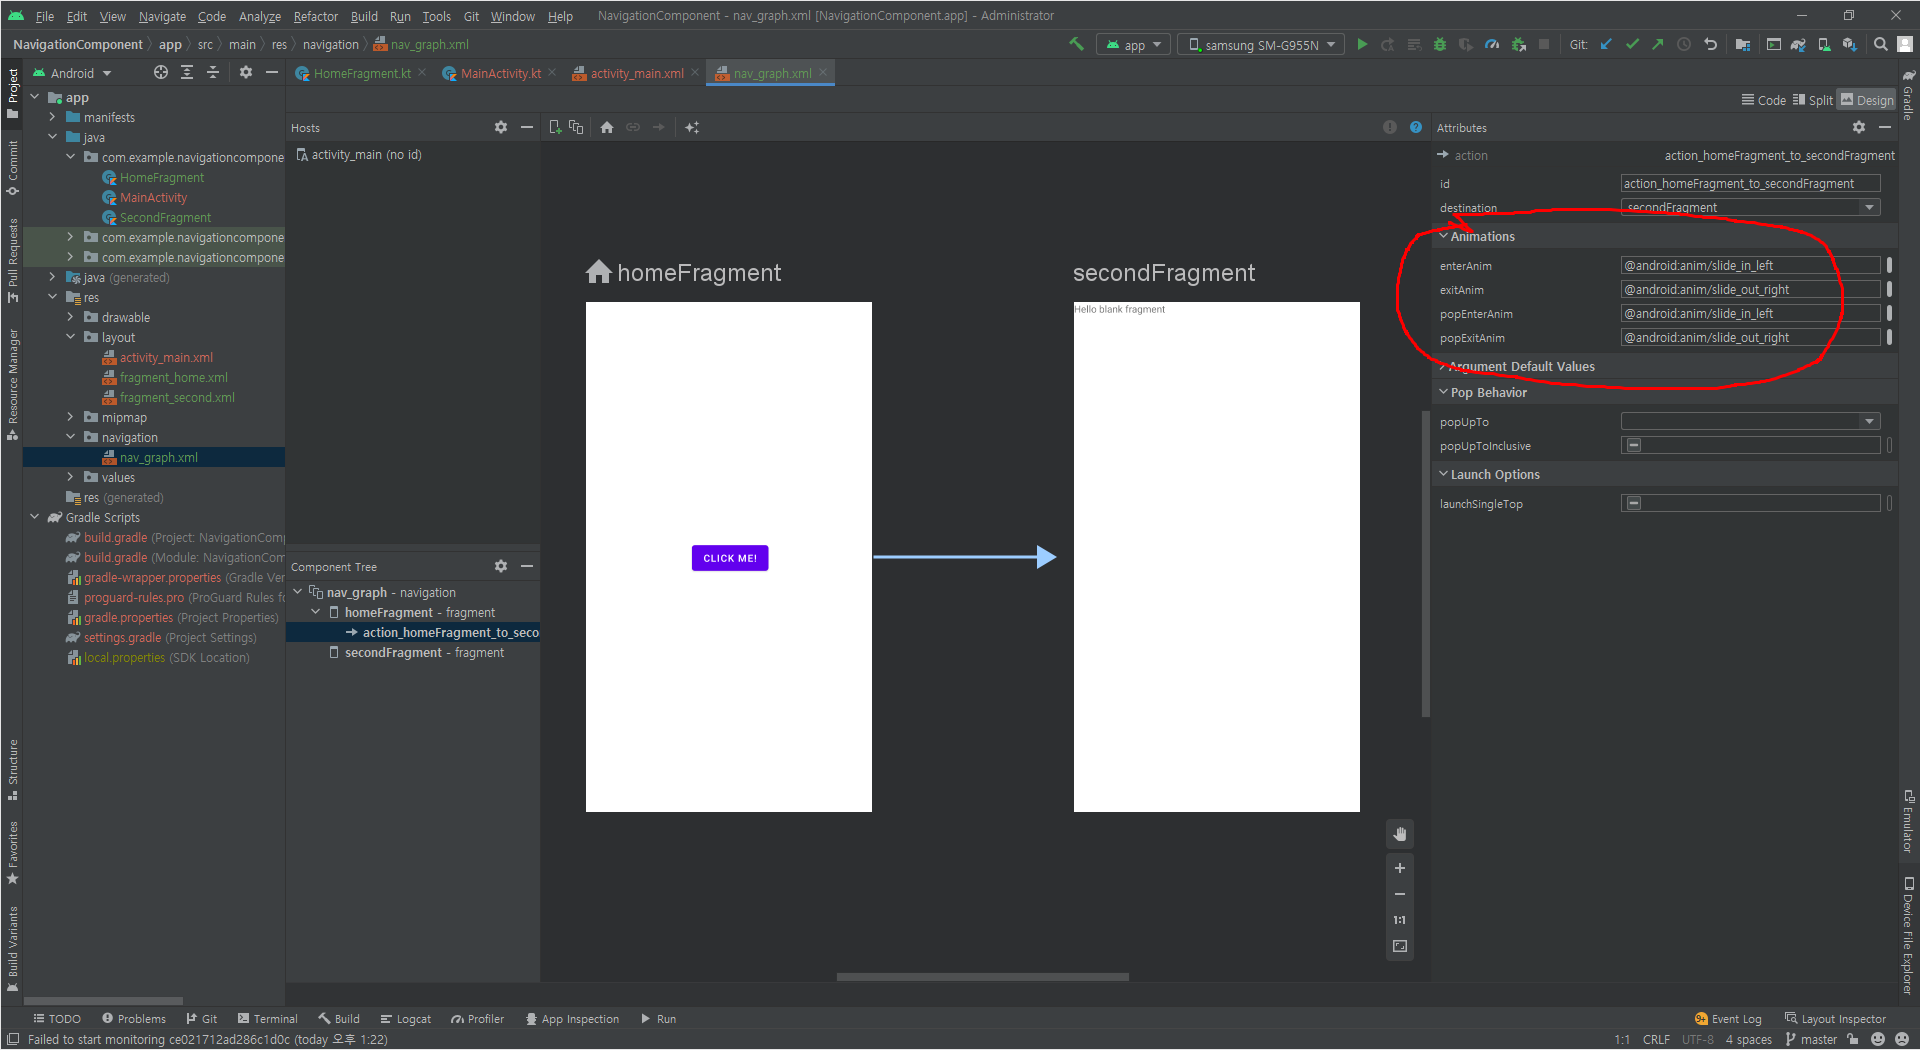
애니메이션은 4가지를 설정할 수 있는데, 찾아본 결과 각각의 역할은 다음과 같다고 한다.
"Entering" refers to the destination that is coming onto the screen, while "exiting" refers to the destination leaving the screen.
Therefore when you navigate from destination A to destination B, the entering destination B will have the enterAnim applied to it and the exiting destination A will have the exitAnim applied to it.
When the user hits the system Back button, going from B back to A, the reverse happens: the entering destination A will have the popEnterAnim applied to it and the exiting destination B will have the popExitAnim applied to it.
https://stackoverflow.com/questions/56285197/what-is-the-difference-between-enteranim-popenteranim-exitanim-popexitanim
간단히 정리하면 프래그먼트 A에서 프래그먼트 B로 향하는 액션이 행해졌다고 했을 때,
enterAnim: B가 화면으로 들어올 때의 효과
exitAnim: A가 화면에서 빠져나갈 때의 효과
popEnterAnim: 사용자가 뒤로 가기 버튼을 눌러 B가 화면에서 빠져나갈 때의 효과
popExitAnim: 사용자가 뒤로가기 버튼을 눌러 A가 화면으로 들어올 때의 효과
위와 같다.
애니메이션은 xml파일로 만들어서 쓰는데,
https://www.journaldev.com/9481/android-animation-example
Android Animation Example - JournalDev
Android Animation Example, TextView animation, Fade In, Fade Out, Blink, Zoom In, Zoom Out, Rotate, Move, Slide In Out, Bounce animations xml source code.
www.journaldev.com
이거 보면 마스터 가능 ㅋ
'개발 > Android' 카테고리의 다른 글
| [Android] Gradle 버전 업데이트 이후 jitpack이 작동하지 않을 때 해결법 (0) | 2021.09.30 |
|---|---|
| Gradle JDK 버전 11로 변경하는법 (0) | 2021.09.27 |
| Coroutine 복습하면서 적는 내용 (0) | 2021.09.26 |
| DI Framework - (2) @Inject, @Component (0) | 2021.09.06 |


